Category: Urban Agriculture

Moringa Tree Planters

Project Hope Art is ready to go with our Moringa Tree Planter Project using recycled materials! In this case, we have coffee sacks and wire coat hangers.

First, you take apart the hanger and make a circle. Then thread it through the open top of the coffee sack, which may have to get cut down depending on how large you want to make it. Use any excess wire to hang your planter!

I’m thrilled to share this experiment with the kids in Haiti! Much thanks to Urban Adamah and Dan’s Cleaners for donating supplies. 🙂

Why do we love the moringa tree so much?

The Moringa tree, also known as the Tree of Life, is known for it’s highly dense nutritional content:

  • 7 times the vitamin C in oranges,
  • 4 times the calcium in milk,
  • 4 times the vitamin A in carrots,
  • 2 times the protein in milk
  • 3 times the potassium in bananas.  
Moringa trees grow easily from seeds or cuttings in hot climates. They grow quickly even in poor soil and can be prepared in several different ways, making the moringa an excellent candidate for fighting world hunger and malnutrition.

Growing Gardens Instructional Guide

Project HOPE Art
Growing Gardens Instructional Guide

Why does Project HOPE Art promote gardening as an art form?
Because art should permeate everything we do to make the world a better, more creative and inspiring place to live.
Art + Science go hand in hand. We need both to live. One feeds our mind and soul. The other nourishes our bodies.

KEY GARDENING INFORMATION

What does Organic Farming mean?
Growing fruits and vegetables without artificial chemicals, fertilizers, pesticides or herbicides. A practice of avoiding chemicals all together in order to be gentle and natural with the earth.

Why should I Repurpose and Recycle items?
To reduce waste and stop contributing to the ugly practice of discarding items carelessly when there is plenty of life left in them. The earth doesn’t need more trash floating in the ocean, in rivers, on the streets and in cities and towns all over. Find beauty in the old and see new ways to re-use your garbage.

Soil
Soil is the essence of gardening. And you must take care of your dirt the same way you tend your fruits and vegetables. Soil health translates to fruit and vegetable health. You want your soil to both drain and retain moisture. You want your soil to receive healthful components found in compost, which means encouraging worms and other helpful creatures. And adding grit or fine gravel to your soil on occasion is the key to finding balance in the composition of your soil.

If your soil is very acidic, add lime. Some vegetables like acidic soil (potatoes, tomatoes, peppers, peas, beans and onions).
If your soil is very alkaline, add leafmold, peatmoss and compost. (The Brassica Family: Mustards and Greens like alkaline soil).

What is Compost?
It is the practice of adding in rotting vegetable and fruit matter back into the soil to amend soil texture, re-introduce nutrients and vitamins and help soil drainage. Using wood for your compost storage bin is the most helpful material because it allows your compost to stay warm (which helps it break down) and allows it to breathe and air out.
You can compost:
-all garden waste
-shredded or chopped woody material
-tea, coffee, egg shells
-newspaper, wood ash, torn cardboard, animal/human hair and straw
-avoid weeds and cooked food

Put all your compost into your bin. Stir it once a week. When your compost has broken down from heat, moisture and time. It should begin to be sweet smelling. That is when it is time to spread it out into your garden.

Vermicomposting: You can add red earth worms into your compost to help it along with the breaking down process. Worms eat your scraps and leave behind their own waste. Worm poop is also vital to soil health.

CROPS

Moringa Trees- The Moringa tree is native to northern India, but today it is common throughout the tropical and sub-tropical regions of Asia, Africa, and Latin America.
Moringa trees grow easily from seeds or cuttings. They grow quickly even in poor soil and bloom 8 months after planting.

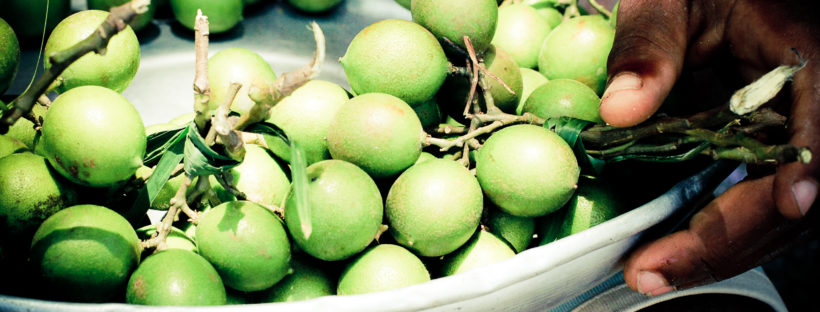
Onions – One of the most useful vegetables to have in your garden.
They prefer open, sunny spots and can be planted almost any time of year, as long as your treat their soil with compost.
They can be grown from seed or small bulbs called sets. They generally take 18-42 weeks to be harvested. Allow the leaves to fall back and flop over, then gently loosen your onion from the soil. Let them ripen in the sun on the ground for a few days.

Cabbages – A fantastic choice for pikliez, salad slaws and accompaniment for braised meats. They prefer open sites protected from wind. They do not like fresh compost, so choose a spot that was enriched with compost one or two growing seasons previous. They generally take 20-40 weeks to be harvested. Cabbages can be troublesome to grow, but if you cut them from the stem carefully you may get a second round of cabbage. Be gentle with them. Store them for weeks in cool, airy places.

Bush Beans – The most versatile bean for cooking, they include kidney, lima and snap. They love sunny, open spots and do particularly well in containers. They generally take 7-14 weeks for harvesting. To sow: make a trench about 1 ½ inches deep, 6 inches wide and as long as you have space (2 feet to 6 feet long)and plant two rows of seeds in your trench. Weed carefully. Keep watch for mice, snails and slugs. They will steal or eat your seeds and young shoots. Once mature your beans are safe. Pick your beans often, the more you pick, the more will grow. Old beans will become tough, so eat them young. You can always return old beans to the ground to grow new beans.

Bush Beans – Also known as Runner Beans, these types of beans are very easy to grow. And adore warm places. They love a sunny, open spot that has not been recently enriched with compost. They grow well in containers. No matter where you choose to grow them, make sure you have a firm stake in the ground to train your beans upwards towards the sun. They will be ready to harvest in 14-26 weeks. Pick the beans often and eat them same day or next day. This may mean you have to share your bounty with friends and family.

Lettuces – The widest range of textures, colors, flavors and appearance. Lettuces will tolerate shade but prefer open, breezy sun spots. Moisture-retentive soils are best. You can grow them almost any time of year. They will be ready to harvest in 6-15 weeks. The same plants will go on growing new heads, providing you with an economy of space.

Beets – A joy to have in the garden with it’s splashy colors. Very easy to grow, Beets love equally large containers and rich, light soils with lots of sun. Start with many seeds in the ground and thin them out as necessary to give ample space to spread out and grow. In general, you can expect to harvest in 8 weeks. Simply pull them from the ground. Younger, smaller beets are juicier and more flavorful.

Tomatoes – Prepare to be amazed with the incredible flavor of a homegrown tomato. They need sunshine and ample space to stretch out. You will undoubtedly need to provide stakes or a support system to hold the arms of the tomato plant aloft and keep tomoatoes from unnecessarily rotting on the ground. Establish a watering routine to avoid the fruit from splitting or bursting. They generally take 8 weeks to be ready for harvest.

Moringa Seedlings

Here at PHA we have a smaller internal team dedicated to germinating Moringa Seeds. It’s proving to be a tough endeavor coaxing life into these dry, scaly seeds in the cool Northern California climate.
Our last seed germination project, a Pwa Workshop was so simple and straightforward. You can grow a 3 inch bean seedling in under a week with almost zero effort. Not so with these Moringas.

Lead Artist Jenni Ward incubated these two seeds on a fish tank light. Then I carelessly left them on a windowsill in my Oakland, CA apartment over the weekend and came home this morning to discover green life.

Music to my eyes.

Following are planting instructions for Oleifera Seeds from Moringa Matters.
There are many ways to plant Moringa seeds. Some Moringa growers soak the seeds for a few days, some plant them in pots, somesow them directly into the ground. Our best results have come from starting them in small pots, in loose, organic potting soil that has some coconut coir mixed in with it.

Plant them about 3/4 to 1 inch deep, and tamp the soil down on top of them loosely. They do not like compacted soil. Then, water them thoroughly, put them in a warm place with as much light as possible, and wait. You can give thema little water every day, until they sprout – then, every other day, water until the soil on top is moist. Too much water – they will drown!

Once they are about 8 inches tall, we plant them right into the ground or transfer them into larger pots. You can start them in Jiffy Peat Pellets, but peat does not provide enough nourishment for them to thrive. If you use the Peat Pellets, transplant them into larger pots filled with potting soil, when they are about 3 inches tall – Jiffy Peat Pellet, and all!

Above, we mentioned soaking the seeds. If you do, be prepared – they develop a strong, unusual smell. We usually plant ours right into the potting mix or into the ground, but soaked seeds are fine – just remember to use the water they soaked in, when you are planting them. They do not care for clay, heavily compacted soil, vermiculite, or peat pots. The Jiffy Peat Pellets are fine for sprouting them, but peat pots dry out too fast for Moringa seedlings. If that is all you have to use, you will have to keep a close watch on them, so they do not dry out.

If you intend to start them right in the ground, please remember that Moringas are considered to be a tropical tree, and they require sunlight, warmth, and some water to grow properly. Once they are firmly established, with “woody” trunks, Moringas can withstanddrought-like conditions – but, they need the 3 items underlined above, to get off to a good start. Moringa seeds prefer to sprout in temperatures that are between 70° and 90°F. Allow for good drainage, however you plant them, as their roots will rot in soggy soil.

Within 2 weeks of planting your Moringa seeds, you should have seedlings up, sporting healthy, green leaves. Once they put out some distinct branches, water them only once or twice a week. They do not like their roots to be standing in wet soil, so be sure they have good drainage. When they are about 8 to 10 inches tall, we start to harvest a few leaves from each seedling, by cutting the branches in half, which encourages them to “bush” out.

Not too much water, lots of warmth, occasional organic fertilization, some water, and your Moringa seeds will sprout, and grow into lovely, valuable Moringa trees!

Magic Moringa Tree

We are always open to exploring sustainable, gardening, food production-centric art projects. It was with excitement that we stumbled onto the Moringa Tree upon a recommendation from a former Peace Corps volunteer who had worked with the tree in Africa. Also commonly known as “the horseradish tree,” the leaves from this plant have:

7 times the vitamin C in oranges
4 times the calcium and 2 times the protein in milk
4 times the vitamin A in carrots
3 times the potassium in bananas

About the Moringa:
Moringa oleifera is known as a miracle tree by international aid groups across the world. The tree suprisingly has more beneficial uses to humans than any other plant species. Moringa is the sole genus in the flowering plant family Moringaceae. The name is derived from the Tamil word murunggai (முருங்கை) or the Malayalam word muringa, both of which refer to M. Oleifera. It contains 13 species from tropical and subtropical climates that range in size from tiny herbs to massive trees. The most widely cultivated species is Moringa Oleifera, a multipurpose tree native to the foothills of the Himalayas in northwestern India and cultivated throughout the tropics.

Moringa Oleifera is known as the drum stick tree in India and is used all across Asia and Africa. It is considered a miracle tree because of its high nutrient value; it has more vitamins than spinach, cabbage, or any other leafy vegetable. It is highly valuable because every part of the plant has a function, including the use of the flowers for medicinal tea and the use of the peapods as food.

Significance for Haiti:
Haiti ranks highest for malnutrition in the western Hemisphere, and over half the population lives below the minimum level of dietary energy consumption. Moringa will help provide lactating mothers and infants get the nutrition they need in early development, when it is the most vital. The leaves of the Magic Moringa contain all essential amino acids and are rich in protein, vitamin A, vitamin B, vitamin C, and minerals. Feeding the high protein leaves to cattle has been shown to increase weight gain by up to 32% and milk production by 43 to 65%.

More importantly, the dried seeds can purify unsafe water. By leaving the dried seeds in a bottle of unclean water overnight, between 90-95% of the bacteria can be purified.

The HOPE Art project will be focused on teaching the children to grow their own Moringa trees from cuttings and developing an artful cookbook focused on incorporating Moringa Leaf Powder into standard Creole cooking. We will also be working on creating planters from reclaimed buckets, barrels and coffee or banana bags with chicken wire.

To grow from a cutting:
After the trees have stopped producing fruits each year, branches need to be cut off so that fresh growth may take place. These branches are excellent for growing new trees.

Make a cutting at least 1″ (2.5cm) in diameter and at least six feet (1.8m) long.
Dig a hole 3 ft. (1m) x 3 ft. (1m) and 3 ft. (1m) deep.
Place cutting in this hole and fill with a mixture of soil, sand and composted manure. Pack firmly around base of the cutting. Form a slight dome or cone shape, sloping down away from the cutting. It is desirable that water not touch the stem of the new tree.
Water generously, but do not drown the cutting in water.
In India, the custom is to put some cow dung on top of the open end of the cutting. This is an excellent way to protect the cutting from pests.

Worms 101

[slideshow]

HOPE Art Haiti Vermicomposting Project Overview

Project Overview: Through a process called vermicomposting, food scraps are fed to worms and transformed into a nutrient-rich compost for plants and gardens. Vermicomposting can help businesses and schools save money.

VermiCompost Bin: Wooden bins can be constructed by students, staff, or parents. The size and number of bins needed will depend upon the amount of food scraps produced by your school. Roughly one square foot of worm bin is needed for each pound of food waste produced per week. For example, if your school generates 30 pounds of food scraps each day, five days per week, you will need 150 square feet of bin space to handle the 150 pounds of food each week. Five bins that are each 4 feet by 8 feet (32 square feet) will give you a 160-square-foot area for food scrap recycling.

Worms: Two species of red worms, eisenia foetida and lumbriscus rubellus, work best for vermicomposting but they can’t tolerate high temperatures. Composting worms do night like light. They will do whatever is necessary to escape the light. So keep your compost bins completely dark.

WORM 101
10 year old Jared helped me with phase 1 of this vermicomposting project: Working with Worms for the First Time.
I picked up a carton of live red worms from a nursery for $14.99 for 2lbs of worms. They were in a refridgerated case, chilled. Like wine, but they are worms. Ha!

Jared cut two San Jose Mercury Newspapers into strips and put them into an old plastic bin. He added about 3 cups of water. Then topped that off with leaves and food waste from the Green Bin in his backyard. We added rosemary and chamomile from his front yard so it wouldn’t smell too badly.
Then we added a bit of peat moss and dirt and finally the worms.

The bin is stored on my back patio in partial sun/shade with the top of th ebin ajar to allow oxygen to flow freely. The dirt feels and looks mostly moist, but not wet. I do believe my red worms are having a grand old time chomping waste into usable top soil as we speak.