[slideshow]
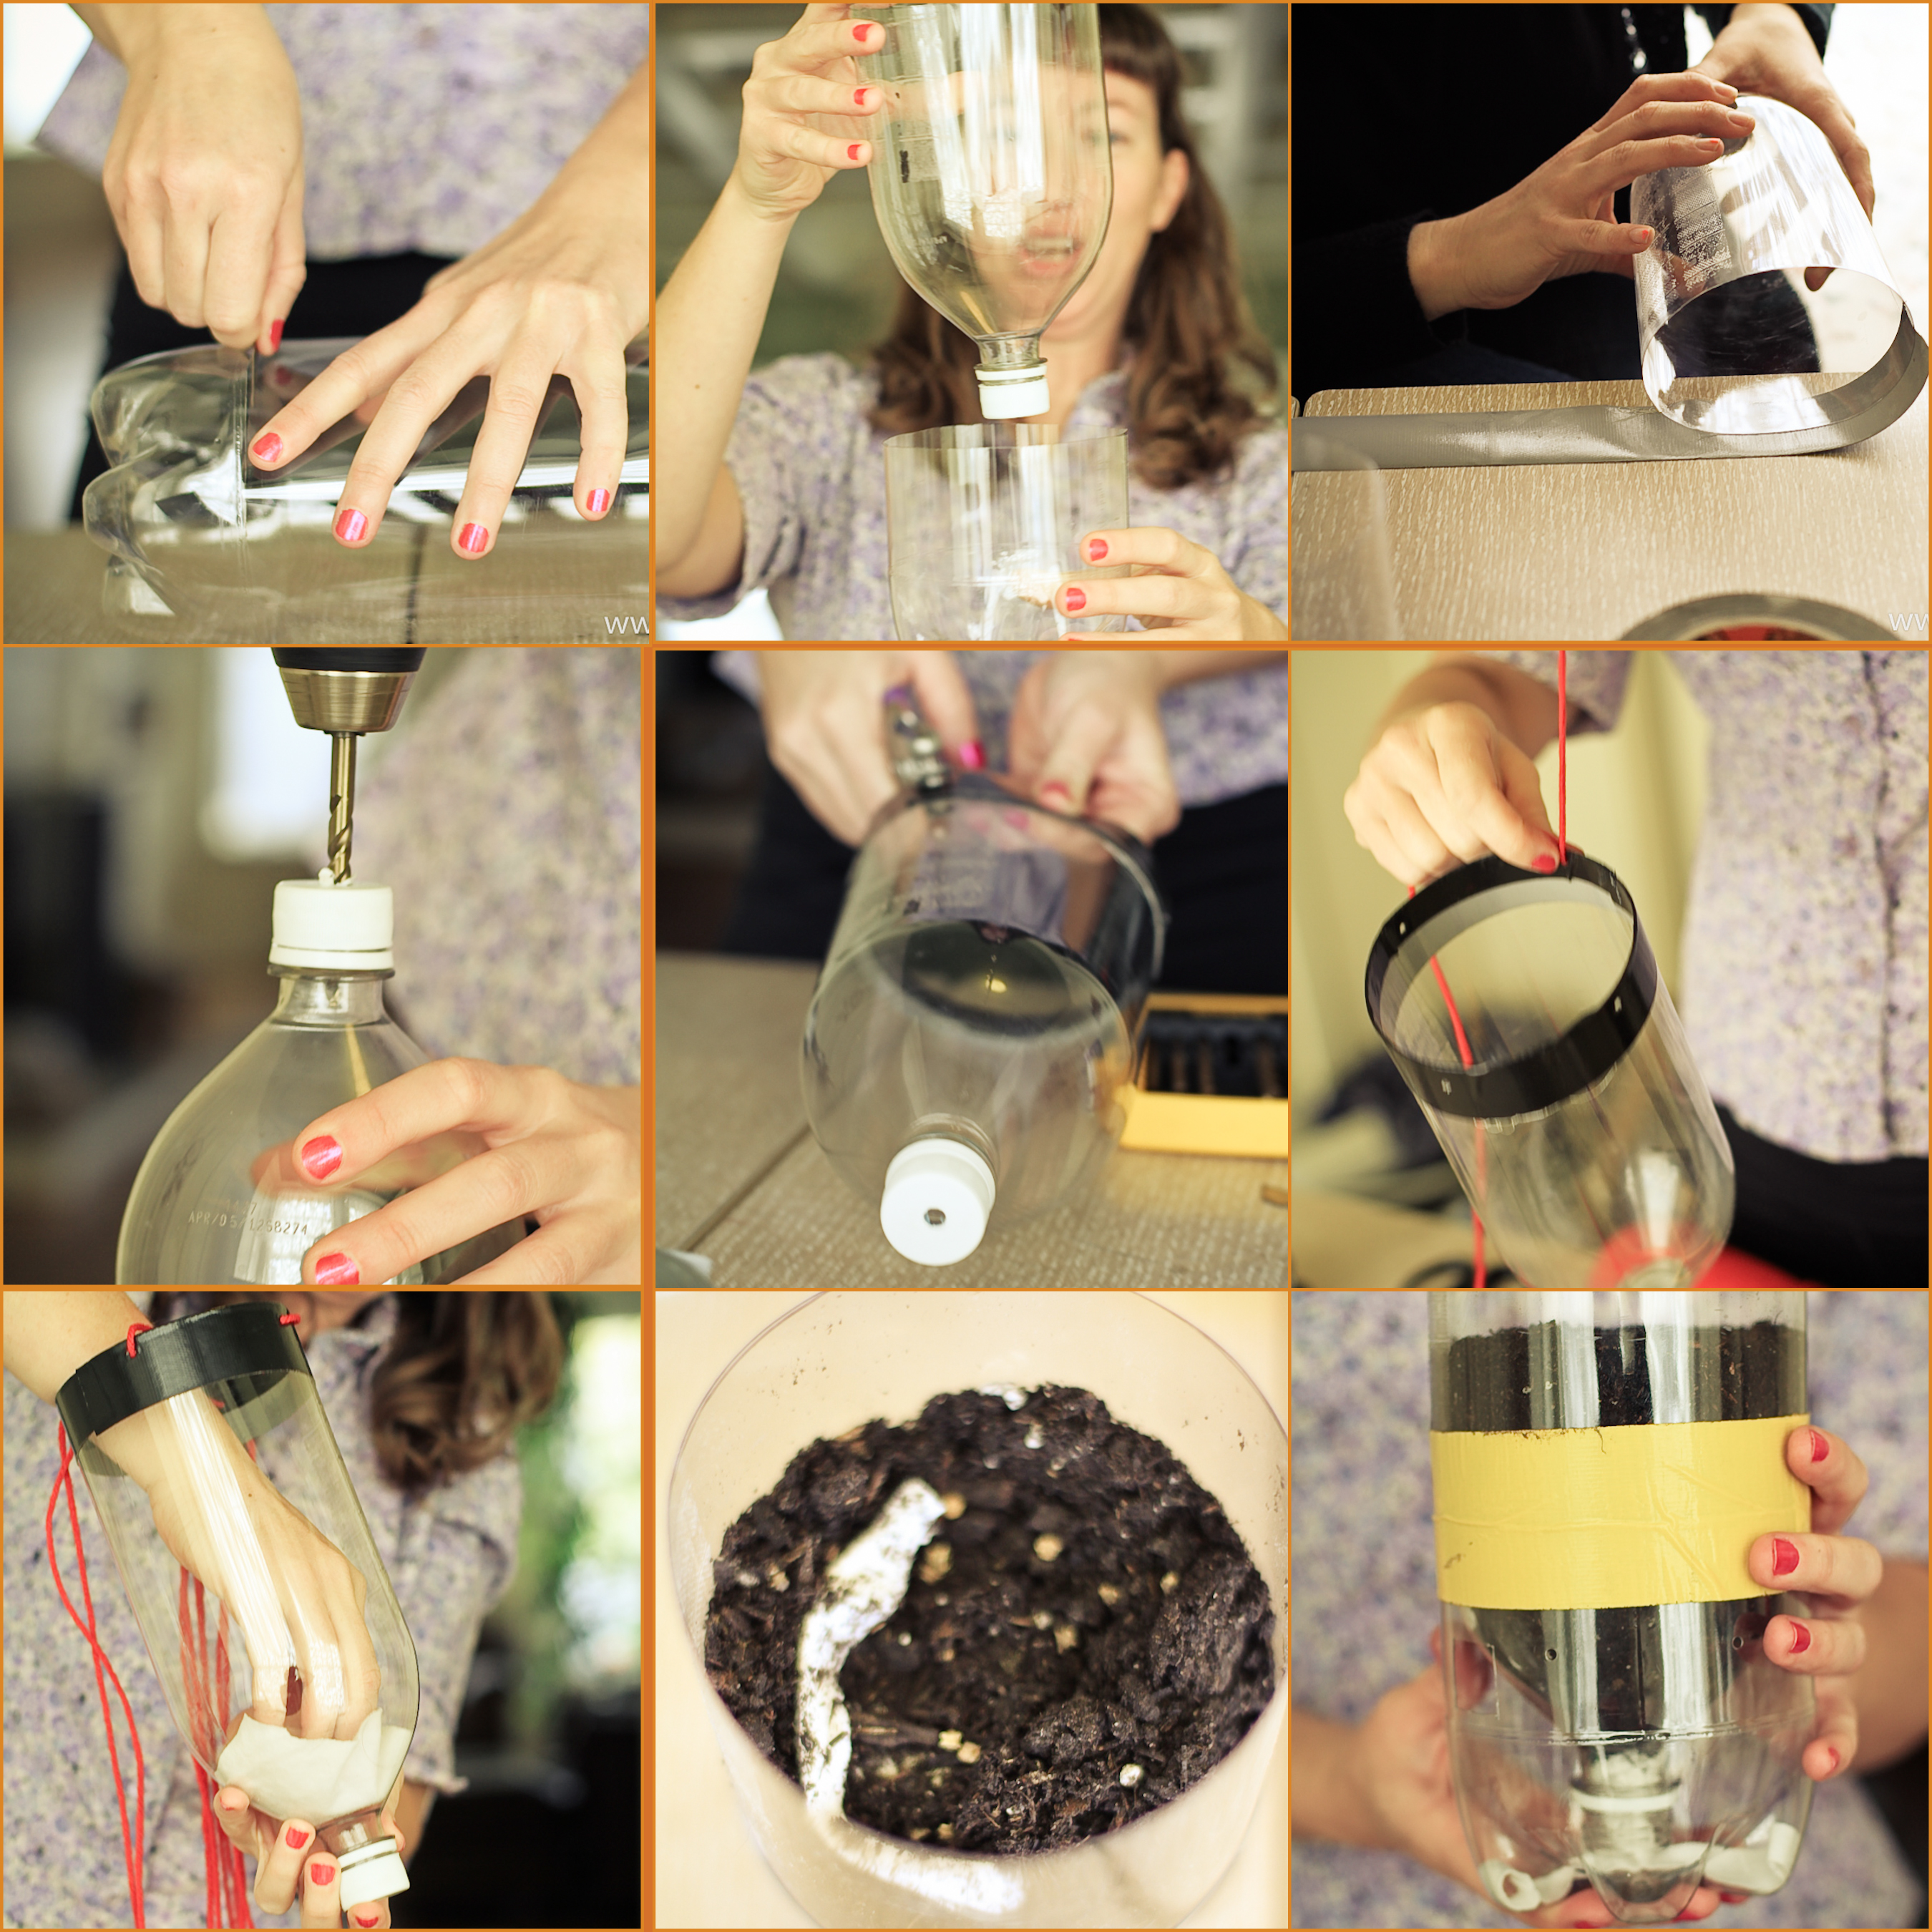
Here’s how you can make your own sub-irrigated planter out of a discarded plastic 2-liter bottle.
Things You’ll Need:
Plastic 2-liter bottle (1 liter also works)
Razor blade or scissors
Old cotton t-shirt or a piece of scrap fabric approx. 12″x1″
Single-hole punch
Newspaper
Soil
Seedling
Optional:
Duct tape and plastic lanyard or other waterproof string (if hanging planter)
Fine-grade sandpaper and acrylic paint, or paint formulated for use on plastic (if painting planter)
Instructions:
1. Rinse bottle and remove the label and cap. Cut the bottom third of the bottle off with a razor blade or scissors. The top two thirds, turned upside down and nested in the bottom third, will be the planter. The bottom third will be the water reservoir.
2. Cut three strips from an old white t-shirt or scrap of fabric, approximately 12 inches long and 1/4 inch thick. Tie the strips together with a knot 3 inches from one end. These are your wicks.
3. Punch holes around the top of the water reservoir (the bottom third of the bottle) for air flow.
4. Turn the planter (the top of the bottle) upside down, thread the short ends of the cotton wicks through the mouth of the bottle from the inside, and place inside the water reservoir. Make sure the knot is large enough to stop up the mouth of the bottle, so the soil will not fall out.
5. Line the planter with newspaper. This is so the plant roots don’t get burned by the sun. If you are painting your planter (see “Options” below), newspaper is not necessary.
6. Pull the wicks up and lay over the side of the planter. Fill the planter one-third full of soil, keeping the wicks straight up the middle. Coil the wicks throughout the soil as you fill the planter up almost to the top. Plant your seedling and cover lightly with soil.
7. Add water to the bottom of the bottle, which is your planter’s reservoir. The cotton wicks will hang down into the water and draw it up into the soil.
8. Set your new self-irrigating planter on a sunny windowsill and watch your plant grow! Add more water to the reservoir whenever it gets low.
Options:
Hanging planter:
If you want to hang your planter, cut a “window” near the top of the water reservoir in Step 3. This is where you’ll pour the water in. Attach the reservoir to the planter by duct-taping around the bottle where the two parts meet. Cut five pieces of plastic lanyard or any waterproof string approximately 3′ long (depending on how high you want to hang your planter). Tie a knot with all five pieces 4 inches from each end. Place one knot at the bottom of the bottle, thread the strings up around the bottle, and add another strip of duct tape around the bottle and strings to hold them in place. Hang the planter from the knot at the top.
Painted planter:
If you want to decorate your planter with paint, after cutting the bottle, sand the surface of the planter section only (not the reservoir) lightly with fine-grade sandpaper so the paint will adhere to the surface of the plastic, then paint with a light-colored acrylic paint. (Dark paint may draw too much heat into the roots). Alternately, you can use paint formulated for use on plastic, which does not require sanding the bottle first. Let paint dry thoroughly before continuing with planter construction.
